image2

Perfectly Proved Dough … I love seeing this!

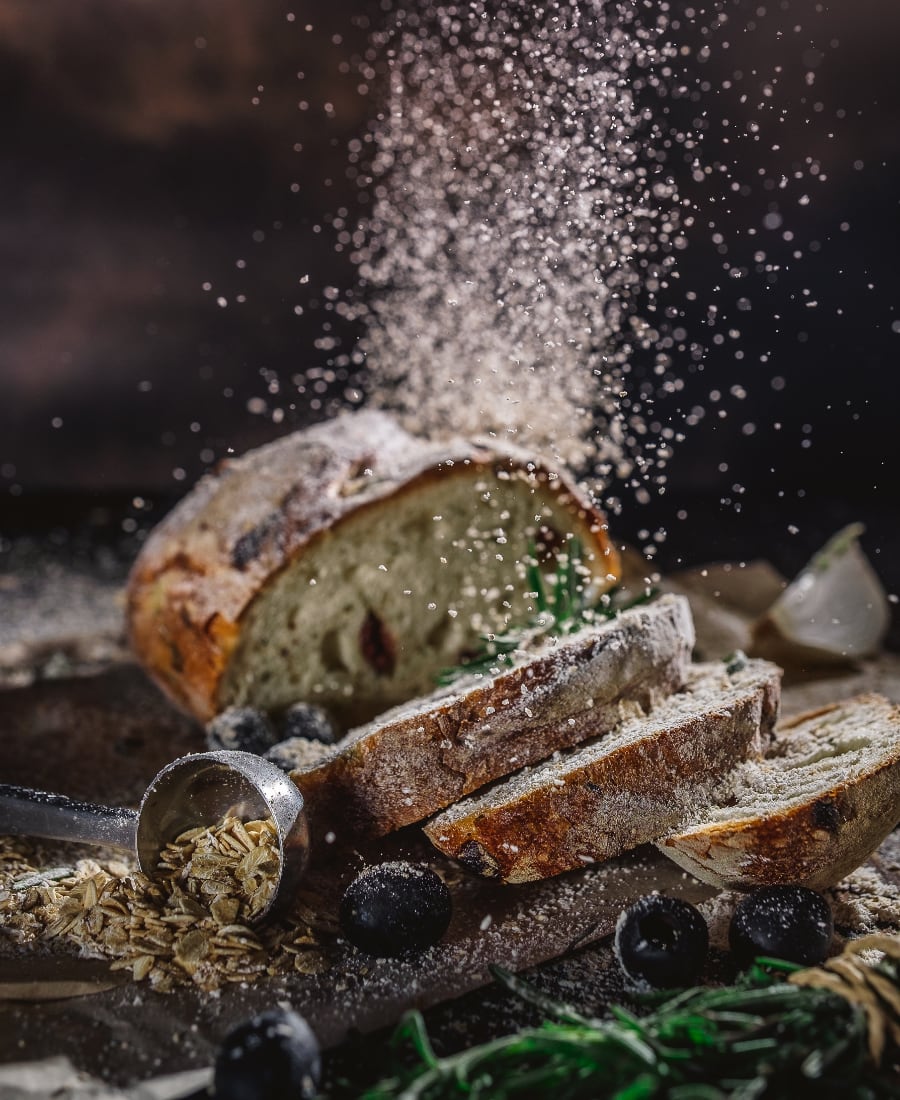
I’m Elaine Boddy, some of you may already know me as Foodbod Sourdough, and this is an image of my dough following its overnight prove (aka bulk prove/ferment/first prove).  The dough has risen and more than doubled in size and you can see the fabulous texture all the way through the dough – these are all of the strong gluten strands which have developed up to this point. It’s a joy every time I wake up to a sight like this, it never ever gets boring!

Bulk Fermenting

The results shown here are based on my master recipe process ( https://foodbodsourdough.com/the-process/ ) where I bulk prove my dough overnight on the counter, however, if you bulk prove differently, the same information applies.

Bulk fermenting is an important step in the sourdough process, for several reasons:

1.  It ‘proves’ your dough for the first time – many people who are concerned about how their loaves have come out assume their Starter is the culprit, this may be the case, but keep this in mind: if your dough is growing and doubling during the bulk ferment, your starter is fine and working well, the dough shows you that.

2. It gives the dough time to build strength and elasticity.

3. It starts to build flavour

Troubleshooting

Achieving dough expansion is important. If your dough isn’t doubling or growing during this part of the process, there are some reasons why this may be happening.

1. The ambient temperature was too low – temperatures under 18C/64F will slow the growth of your dough down; just give it a few hours longer in the morning to do its work. You can even give it another round of pulls and folds to wake it up then a few more hours to prove.

2. Your Starter needed a little boost – Boosting your starter is easy, and simply done with a couple of days of aggressive discarding and feeding. Try feeding at least twice a day in the lead up to baking. ( https://foodbodsourdough.com/how-to-boost-your-starter/ )

So we’ve dealt with under proving due to the dough being too cold, or a weak Starter, then there is the risk of over proving! If it’s been warm overnight, well over 20ºC/70ºF, your dough may grow fast and possibly more than double, it will look volcanic, active, bubbly and fabulous, however, it risks over proving and losing all structure and integrity, basically it will become more Starter and will be soft, sloppy and impossible to work with.  There is no coming back from this as far as structure goes.  ( https://foodbodsourdough.com/making-sourdough-in-hot-temperatures/ )

Getting it just right

Under proved dough will result in a dense loaf with large uneven holes. On the other hand, over expansion and fermentation – over proved dough – will result in a flat, dense, bake, but it will still taste good and the extra fermentation may even increase the sourdough flavour.

So how do you get it right?  Firstly try bulk proving during the day so you can watch your dough, if it grows quickly, almost doubles and starts getting bubbly, it is moving towards being over proved. Move it to a lower temperature. If you are short on time and fear over proving, shove it in the fridge and come back to it later. Or it has almost doubled and you have time, get shaping, get in into a Banneton and get it into the fridge.

To do the bulk ferment as an overnight process and combat warmer temperatures throughout the year, the simplest and easiest solution is to use less starter in your dough recipe. Less starter in a dough means the dough grows more slowly, and in the warmer temperatures, this is a perfect solution.

As a guide to getting the perfect first prove, when you handle your dough it should feel bouncy and have some nice resistance. Under proved dough will still be stiff. Over proved dough will be sticky, and soft, and hard to shape or do anything with.

My best tips are: 

  • Learn to watch your dough and not the clock; your dough well tell you what’s happening and what you need to change, if anything
  • Get to know your Starter
  • Get to know your flours and your doughs
  • Get to know how sourdough works in YOUR home
  • Make notes, jot down timings, and temperatures, flours and behaviours, and create your own reference guides

More importantly, resist the temptation to compare your doughs and bakes with others. Every creation is different due to different flours, different temperatures, different environments, different handling and different ovens. The key is to understand yours and how your dough behaves in your kitchen for you.

And the good news is… It’s very rare that a loaf won’t taste good!

Happy baking!

x Elaine x

Website: https://foodbodsourdough.com/

Share on Facebook

2 thoughts on “Perfectly Proved Dough … I love seeing this!”

  1. I love your book, The Sourdough Whisperer! I bought myself and my 2 married daughters each a book and they love it too. It is so helpful when learning the many techniques. Thanks for your efforts!!

Leave a Comment

Your email address will not be published. Required fields are marked *

Related Posts

Artos Bread

Artos – Greek Bread

History Artos bread has a long history in Greece and has been baked for various purposes since ancient times. The word “artos” comes from the

Sourdough Hot cross buns

A little history of Hot Cross Buns

These buns were traditionally eaten on Good Friday – the Friday preceding Resurrection Sunday/Easter on the Christian calendar – but in some countries, due to

This ancient loaf of bread was baked on the morning of the 24th August, 79 CE. The loaf survived the eruption of Mount Vesuvius and was “carbonised” by pyroclastic flow (lava). It was found in the Ancient Roman town of Herculaneum in 1930.

Pompeii Bread

In modern times, it continues to be popular among bakers and eaters alike for its unique flavour and texture profile. The traditional recipe for Pompeii

Submit your recipe

Once you submit your recipe it will be reviewed before it is published to the site.

This is optional and will only be used to notify you when your recipe has been published. It will not be published and seen by the public.


[webmap-submit]
Lame

noun

A special sharp knife, or tool which holds a razor blade, in a curved or straight manner. You use it to score the dough before baking.

Dutch Oven

A Dutch Oven is generally understood to be a covered earthenware or cast-iron container for cooking casseroles. They are ideal for bread as they can accommodate bread dough and be covered to help generate the steamy environment requiredto encourage the dough to rise. Enamel roasters with a lid, covered pyrex dishes, or even a flat tray with a bowl over the top of the dough, are equally effective.

Bakers’ Percentages

Sometimes called baker’s math, this is a method to express the different ingredients as a percentage of the total amount of flour. It makes scaling a recipe or building a recipe very easy once you know the total weight of the flour, and also allows you to know the ‘hydration’ of your dough.

Example: If you build your dough with 1000 gram flour, 670-grams water, 20-gram salt, and 8-gram yeast. According to bakers percentages, that will be 100% flour (the amount of flour is always 100%), 67% water, 2% salt, and 0.8% yeast.
You divide the amount of the different ingredients with the amount of flour.

Banneton / Brotform / Proofing Basket

A type of basket or container used to provide structure for shaped loaves of bread during proofing. Banneton baskets are also known as ‘Brotform’ or ‘proofing baskets’. It is normally used for doughs that are too soft or wet to maintain their shape while rising. They come in a range of sizes and shapes. Look for ones that fit the size of loaves you want to bake.

They are often made of natural rattan, or wood fiber. You can also use any container lined with a well-floured tea towel.

Oven Spring

The final burst of expansion of dough upon being introduced to a hot oven and where the yeast activity is increased during the first few minutes. At approximately 60C/140ºF degrees the yeast is killed off, but up until that point, dough can expand in the oven in the first phase of baking if it’s not over-fermented and still has dough strength. Many factors can impact oven spring including the length of fermentation, gluten development, and the hydration of the dough.

Stretch-and-Folds

An alternative to traditional kneading used to develop gluten. The process is performed periodically in the bowl throughout the bulk fermentation. Take a side of the dough and gently stretch it up and over, to fold it upon itself, rotate the dough 90º, and repeat, then turn the bowl 45º and the same stretch and fold. Once all four corners of the dough have been stretched and folded, gluten development and a smooth, elastic dough are underway. Also, see ‘Folding’ and ‘Coil Folds’.

Bulk Ferment

Most loaves have two fermenting cycles. One before and one after the loaves are formed. Bulk fermentation is the first cycle, with a long fermentation period of the dough after the initial mixing of flour, water, starter, and salt and often comes during and after a period of kneading or ‘stretch and folds’.During this stage we are aiming to create dough strength, structure and flavor. The dough should feel alive, strong, airy, spongy and the surface shouldn’t feel sticky.

The bulk fermentation generally takes place at room temperature, unless otherwise noted in the recipe and is a longer period of time (4 -12 hours) than the final proofing period. This step may be referred to as the first prove or first rising. Acetic acid, an organic acid is produced by bacteria in the sourdough culture during the fermentation process. The presence of acetic acid helps to gives sourdough its characteristic acidic tang. The warmer the environment, the faster the development of the dough will be

Window Pane

The window pane test is one of the best ways to tell if you’ve sufficiently stretched and folded your bread dough. Pull a small piece of the dough and using both hands and your fingers stretch the dough very thin if it holds its shape without tearing the gluten is well-developed and your dough is ready to be pre-shaped, shaped and rest for it’s final prove.

Starter / Starter Culture / Sourdough Starter

A mixture of flour and water used to leaven bread that contains bacteria, yeast, and organic acids. Made either by inoculating with an established colony of bacteria or by capturing wild bacteria and yeasts over a longer period. Sometimes also called Leaven / Levain.

Autolyse

verb

Autolyse (pronounced auto-lees) is a process in which a portion of (or total) water and flour in a bread recipe are gently pre-blended and set to rest for a period of time.

This resting period gives the dough special processing characteristics and improves the overall quality of the baked goods.

During autolyse process, several events can occur in the pre-mixed water/flour mixture:

  1. Continued flour hydration. Water molecules work their way into damaged starch, intact starch granules and proteins.
  2. Protein bonds continue to develop as a consequence of adding water, creating more gluten strands without mechanical work. This leads to better gluten structure and gas retention.
  3. Flour enzymes (mainly proteases) acquire time to adapt and work on the gluten by breaking down protein bonds.Protease activity is higher at low pH (acidic conditions). This is why autolysed doughs that contain yeast or pre-ferments (e.g. poolish) often experience greater protease activity. Such doughs are more extensible, weaker, softer and show less resistance to deformation than autolyzed non-fermented doughs.2
  4. Finally, as a result, the dough feels less sticky and very smooth after the autolyse.

As a general rule, the longer the autolyse time:

  • The shorter the dough mixing time (less mechanical development of gluten-forming proteins in needed). This means less energy consumption during mixing.
  • The shorter the dough stability duration
  • The less tolerance to overmixing. Breakdown is more pronounced once peak (maximum strength) is attained.
  • The smaller the P value in the alveograph test
  • The more extensible and less elastic the dough becomes at the end of autolysis
  • The better the sheetability and machining of dough during lamination of croissants
  • The easier and faster the dough expands during oven spring (better volume)
  • The lower the need for dough conditioners
  • The better the flavor and aroma of the finished product
Leaven/Levain/Sourdough Starter
noun
  1. A substance, in this case a wild yeast starter, that is used in sourdough baking to make dough rise.
  2. Some methods of baking, such as ‘Tartine Method’ require a sourdough leavening agent be made from a sourdough ‘mother culture’ (aka your Starter). This technique is often employed to boost the yeast activity of the sourdough starter by feeding a small amount of starter a larger quantity of flour and water. For instance, if a recipe calls for 1 cup of sourdough starter, a leaven can be prepared 8-12 hours before the dough will be mixed by combining 1 Tablespoon of sourdough starter with ½ cup flour and a scant ½ cup of water. This leaven can then be used as the sourdough starter and will be quite active come baking time.
verb
  1. cause (dough or bread) to rise by adding leaven.